Siamo nel 2020 e sembra esserci un rinnovato interesse nei confronti delle BBS. Per chi sapesse cosa siano, in breve e in modo molto approssimativo BBS (Bulletin Board System) erano dei servizi telematici (in voga negli anni 80 - primi 90) di messaggistica e scambio file, che "viaggiavano" sulla comune linea telefonica, e i cui nodi erano gestiti in gran parte dalla comunità di hobbisti e amatori. Ci si collegava tramite modem spesso alla velocità di 1200bps (150 byte al secondo) e l'interfaccia utente era esclusivamente testuale, con caratteri ASCII che simulavano "grafica". Oggi le linee telefoniche analogiche non esistono praticamente più e le BBS sopravvissute si sono spostate su Internet, dove ne nascono anche di nuove. Per potersi collegare tramite un vecchio computer serve ovviamente un collegamento seriale, ed è semplice trovare online progetti e realizzazioni di modem Wi-Fi, cioè dispositivi che connettendosi alla porta seriale RS-232 emulano il funzionamento di un modem analogico, collegandosi però in TELNET a

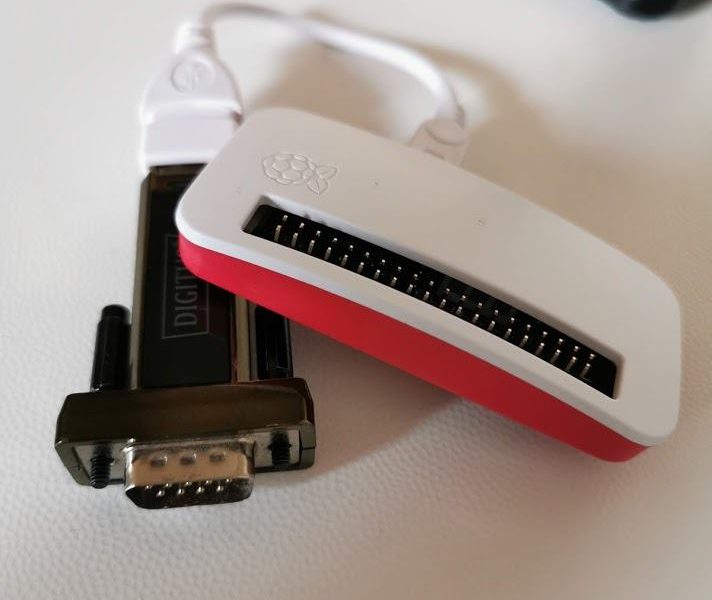
un host remoto (specificando la porta). Avendo però a disposizione un Raspberry PiZeroW e un adattatore USB -> RS232 è possibile realizzarsi in casa un modem Wi-Fi a "costo zero" (oltre quello del Pi e dell'adattatore!) senza bisogno di saldature e modifiche. Ecco quindi un breve tutorial su come realizzarlo. Innanzitutto occorre un adattatore USB -> Seriale RS232. Ho utilizzato nel caso specifico un modello Digitus, disponibile anche su Amazon (qui il link al prodotto), che ha funzionato al primo colpo sul PiZeroW senza bisogno di ulteriori "smanettamenti". Installazione del sistema operativo Il PiZeroW è fornito di solito con una microSD con già installato Raspberry Pi OS. Supponiamo però di partire da zero, avendo a disposizione una microSD vuota. Il modo più semplice e immediato per installare un sistema operativo sulla microSD è utilizzare il tool RPI Imager, distribuito gratuitamente a questo link. Al primo passaggio, CHOOSE OS, scegliete "Raspberry Pi OS (Other)", e di seguito la versione leggera "Raspberry Pi OS…

The purpose of this document is to clarify how variables are stored in RAM and how this information can be used. This information applies to Apple-1 (both Originals and Replicas) and to most of the emulators. A brief recap, taken from the Apple-1 PRELIMINARY BASIC USERS MANUAL: Let us suppose, from now on, that the memory configuration is "standard" according to the indications in the manual: PRIMARY RAM BANK from address \$0000 to \$0FFF (4096 bytes) OPTIONAL RAM BANK from address \$E000 to \$EFFF (4096 bytes) BASIC will be loaded in the optional RAM BANK. We will not consider memory manipulation made by LOMEM or HIMEM commands. When BASIC is running the user’s RAM, by default, is from \$0800 to \$0FFF (2047 bytes). 1. Program not using variables A BASIC program is stored so that its end coincides with the last byte of memory available. In the two examples above, the one-liner 10 PRINT “HELLO” is stored from \$0FF4 to

\$0FFF. If a second line is added (20 PRINT “WORLD”) the entire program is “shifted”. The two-line program now starts at \$0FE8 and ends at \$0FFF. Is it reasonable to assume that variables will be stored at the opposite end of the available memory, in order to avoid any conflict with the program code. A quick inspection of the first locations shows nothing, which is also reasonable because our program uses no variables at all: 2. Program using numeric variables Let us restart everything and declare a variable, and see what happens: As expected, nothing is stored in the “program area” of the memory, since we did not write any program. I choose 32767 as value for the variable because it is hexadecimal \$7FFF and its HI and LO bytes are quite recognisable among all the others. They look to be stored in little-endian notation, two bytes as expected in locations \$0804 and \$0805. Are we able to spot out…

Can an Apple-1 computer decipher a message encrypted with an Enigma cyphering machine in a reasonable time?

Recently I (re)watched the movie “The imitation game”: the English mathematical genius Alan Turing cracks the German Enigma code with help from fellow mathematicians, using an electro-mechanical device called Bombe. At the end of the movie, I found myself wondering: "Would an Apple-1 be able to decrypt a text ciphered by an Enigma machine? If so, how fast would it be?” The Enigma Machine is well documented in all its versions and variants, and the Internet is full of code and emulators. I am not going to explain the operation principles of the Enigma Machine, on the Internet there is a plenty of valuable sources of knowledge. In the Bibliography section, you will find some link. SEARCHING FOR… THE RIGHT CODE What I was looking for was a short source code that could run in a few kiB of memory. In this article, I will not go deep into the mathematical theories behind the "Enigma", and I will not dwell

on the different decryption techniques that could be used. I found many programs, but unfortunately, many of them needed RAM that the Apple-1 simply does not have. Finally, I found the source code candidate to be adapted for the CC65 cross compiler: http://www.cs.miami.edu/home/harald/enigma/ The small program can encrypt/decrypt messages with an user-defined machine setting or brute-force an encrypted message. How does it work? In the movie they use a word, called crib, they believe was encrypted in the message (i.e. “weather”) to program Turing’s Machine. The machine “simply” tries all the permutations of settings in order to obtain the original crib. Due to the huge number of different initial settings of the Enigma machine, this method was very time consuming: many expedients were put into practice to reduce the number of permutations (i.e. the Diagonal Board method discovered by Turing’s colleague Gordon Welchman). The program, written in C language, needed some adjustment to be compiled by CC65. In this, I…

Introduzione In questo articolo vedremo come poter configurare un web server su un C64 non espanso, con il solo ausilio di una unità disco (reale o emulata con SD2IEC/Pi1541), di una cartuccia/interfaccia ethernet, e di un BASIC extender molto interessante. L’interfaccia ethernet viene fornita dalla cartuccia 64NIC+, che mette a disposizione del C64 una connettività a 10Mbit/s emulando diversi standard: RR-NET, TFE, NET64. Ha anche altre caratteristiche interessanti, come ad esempio quella di poter ospitare una ROM/EPROM da caricare al boot ma di queste, per il momento, non ci occuperemo Lo stack TCP/IP viene gestito e programmato appunto da un BASIC extender chiamato BASIC ON BAILS. Scritto da Jonno Downes nel 2010-11 e basato su netboot65, insieme a KIPPER BASIC forma una suite con la quale è possibile scrivere programmi per il networking, in semplice BASIC. A tale scopo vedremo che sono stati aggiunti diversi comandi. BASIC ON BAILS è dedicato allo sviluppo di applicazioni lato server, KIPPER BASIC è

più dedicato allo sviluppo di applicazioni lato client. Dato che il nostro intento è sviluppare un piccolo web server, utilizzeremo BASIC ON BAILS. BASIC ON BAILS (BoB, da qui in avanti) viene distribuito liberamente e va caricato sul nostro C64 come un semplice programma PRG. È lungo 39 blocchi, che equivalgono all’incirca a 10kByte, e lascia dunque memoria sufficiente per realizzare qualcosa di carino, unico e… vostro. Test di connettività e comandi Appena caricato, BoB… dà errore! Ma non c’è da preoccuparsi. Alla prima esecuzione esso è predisposto per cercare sull’unità disco corrente il programma chiamato INDEX.BAS. Non trovandolo darà errore, ma BoB sarà ancora in memoria e pronto per essere utilizzato. Potremo usare questa feature quando saremo soddisfatti del sito web che avremo creato: potremo salvarlo con il nome INDEX.BAS in modo che venga caricato automaticamente all’avvio di BoB. Una bella comodità. Focalizziamoci ora sui comandi aggiunti da BoB al classico BASIC V2 e vediamo dapprima quelli dedicati alla…